Dehydrating 101: Beginners Guide To Dehydrating
Dehydrating food is an easy and effective method for preserving the longevity and integrity of various foods that far exceeds the other well known methods such as freezing and canning!
If you’ve been sitting on the fence about dehydrating food, then this beginners guide to dehydrating food will help you to make a better informed decision that you can put into action quickly and without the overwhelm of searching endlessly online for the most important information to easily get you started.
In this article, you will find:
- A brief explanation of dehydrating;
- Why you should be dehydrating, including the benefits associated with dehydrating;
- How to prepare for food dehydration;
- The shelf life of certain dehydrated foods as well as how to store it correctly;
- Choosing the right dehydrator that is suitable to your needs and dehydration goals;
- Essential equipment and supplies required for dehydrating food; and
- A list of frequently asked questions on this topic.
While this is a great resource to get started, it’s definitely geared towards someone just beginning to dehydrate food. If you are looking for more in-depth articles on any particular aspect of the dehydration process, make sure to check out my other articles, or better yet, be sure to subscribe to my newsletter for regular information and applicable resources!
DEHYDRATING EXPLAINED
If you’ve never heard of “dehydrating” food or aren’t exactly sure what it entails, you’ll want to read this entire comprehensive guide which is perfect if you’re a beginner looking to get into dehydrating!
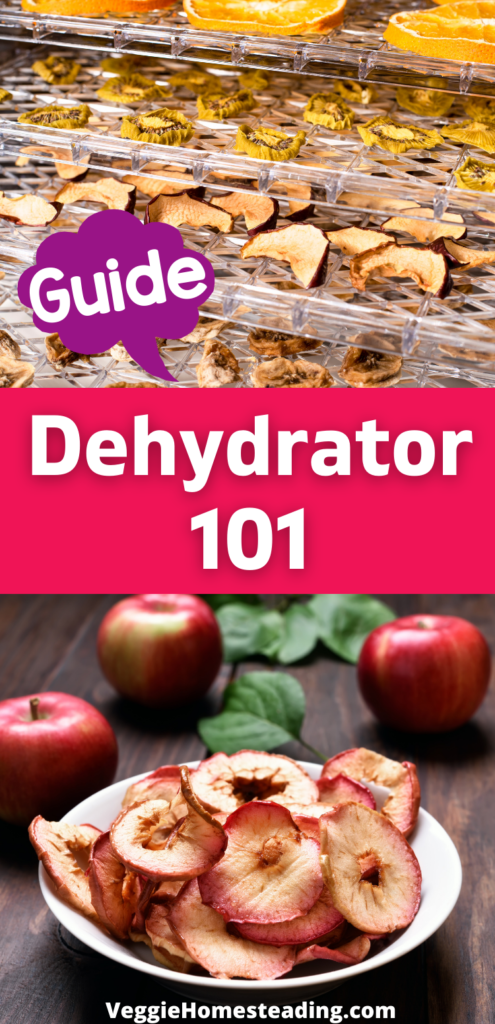
Dehydrating food is essentially another term for drying out food. Using a dehydrator, this method of food preservation removes moisture from food that eradicates mold, bacteria or rot from setting in over the length of time that it is stored, allowing you to enjoy certain foods throughout the year, irrespective of seasonal limitations or budgetary concerns.

WHY YOU SHOULD BE DEHYDRATING
There’s a common misconception among those unfamiliar with dehydrating that it’s a form of food hoarding – as if you are getting ready for doomsday. Mind you, after 2020, I wouldn’t blame anyone for that being their driving force behind taking up dehydrating! But no, it’s not about stockpiling your pantry – there are way more noble and sensible reasons why so many have turned to this practice. Here are a few for you to consider:
THE BENEFITS OF DEHYDRATING FOOD
- It Provides A Reliable Source of Varied Foods
Dehydrating food is an act of preparedness just like other forms and methods of meal prep. It ensures that you have certain foods all year round regardless of season changes or hyperinflation that may have otherwise made the food unaffordable for you to enjoy.
2. It’s Long-Lasting
Dehydrated food is also loved by many due to its long shelf life…anywhere from a one year to twenty plus years depending on the type of food, how well it was dehydrated and the integrity of storage.
3. It Doesn’t Depend on Electricity or Freezer Space
With dehydrated food, you don’t have to worry about exceeding storage space in your refrigerator or freezer or even having unforeseen incidents involving electricity outages which would spoil most short-shelf foods. Simply allocate some storage space in your kitchen, pantry or basement for your dehydrated food.
4. Dehydrating Saves Money
You can save money from not having to buy expensive packaged foods from the local store when you have dehydrated food readily available. It’s also a great way to save money and unnecessary waste in the instance that you have fresh food about to go bad – just dehydrate it!
5. It’s A Healthier Way of Preserving Food
Less nutrients and vitamins are lost through the process of food dehydration when compared to freezing and canning which appear to be harsher forms of food preservation.
In fact, dehydrating food only removes 3-5% of total nutrients and vitamins from foods while freezing removes 40-60% and canning as much as 60-80%.
Any potential loss in vitamins such as vitamin C can easily be restored before dehydrating fruits simply by spraying some lemon juice on them.

HOW TO PREPARE FOR FOOD DEHYDRATION
While you may be getting excited to jump right into dehydrating food, there are definitely a few preparatory steps that should be taken or considered to maximize the success of your dehydrating efforts and the longevity of your dehydrated food.
1. Always Practice Good Hygiene
Whether you are preparing a meal, canning or dehydrating food, always make sure to practice good hygiene in the kitchen and when handling food. This includes wiping down surfaces with eco-friendly antibacterial solutions, washing your hands before handling food and equipment and ensuring that your general environment is clean and sanitary.
2. Wear Gloves
When dehydrating food, it’s important to remember that moisture is not your friend! Without you realizing it, your hands excrete oil and moisture which will transfer to the foods you handle. To minimize the moisture content for dehydrating purposes, it’s best to wear latex or vinyl gloves when preparing and handling your dehydrated food.
3. Preheat Your Dehydrator
As you would preheat an oven, so too you should warm up your dehydrator prior to introducing food into that space. The air flow in the dehydrator will help to eliminate any possible contaminants which is why it’s advisable to get that air flowing by warming your dehydrator prior to adding your food.
4. Stick To Stainless Steel Knives and Cutting Apparatus
When preparing your food for dehydration, consider only using stainless steel knives or other cutting apparatus as anything else may leave your dehydrated food brown in color and while there’s nothing wrong with that, it may not be appealing to the eyes.
5. Get Familiar With The Different Food Preparation Requirements
Dehydrating food is not always as simple as placing your food in the dehydrator and storing it for later use. There are some foods that require extra steps of preparation to be taken prior to going into the dehydrator. These different steps include:
- Steaming low acid vegetables prior to dehydrating: This helps to relax the tissues of vegetables to speed up the drying process, prevents unwanted changes in flavor and textures, protects the vitamins and color of the food, and also helps to reduce the time required to refresh these foods for cooking purposes later on.
- Spraying Low acid fruits and non-leafy vegetables with lemon juice prior to dehydrating: This helps to retain the colors of your fruit and non-leafy vegetables and also adds back a bit of vitamin C which can be lost through the drying process. Note that I recommend spraying and not soaking with lemon juice as soaking can result in sogginess which is not optimal for drying.
Pro Tip: Avoid spraying leafy green items such as spinach or broccoli as the lemon juice will turn these items brown and potentially burn them too.
Pineapple juice is sometimes suggested as a substitute for lemon juice as it also contains a good source of vitamin C although it can make your food items sticky due to its sugar content. I recommend just using lemon juice.
- Precooking certain foods before dehydrating: This includes food items like potatoes (white and sweet) that require cooking before going into the dehydrator otherwise they will turn black. Be careful not to overcook your potatoes otherwise they can fall apart.
- Blanching certain foods before dehydrating: The term “blanching” refers to placing food in boiling water for 30-60 seconds which softens the skin for improved moisture removal for the dehydration process or to assist in the removal of that food’s skin entirely and with little effort. Foods that typically require blanching prior to being dehydrated include soft skin fruit and veg such as: tomatoes, grapes, plums, cherries (and most other berries), peaches, pears, summer squash and zucchini.
There are some foods that don’t require any form of preparation prior to dehydrating. In this case, you simply slice them and add them to your dehydrator! Good examples of these foods include: oranges, lemons, limes, all herbs, spinach and collard greens.

SHELF LIFE OF DEHYDRATED FOOD AND THE BEST WAY TO STORE IT
Believe it or not but dehydrated foods can last anywhere between 3 years to 20 years and beyond if they are properly dehydrated and stored in a cool, dry place.
WHERE TO STORE DEHYDRATED FOOD
The location of where you store your dehydrated food is just as important as how you store the food.
It needs to be stored in a dry cool place which is typically an area of your kitchen, pantry or other areas of your house that keep low temperatures consistently, have limited sunlight and are dry. For this reason, you could easily make use of your basement but make sure that you don’t have tumble dryers or other similar household equipment in the same space that emit moisture through condensation or the like.
It probably goes without saying but you need to ensure that the space being used is also free from any pests such as rodents and bugs that could destroy your food bags and contaminate your food. It’s also important that any area used as storage is kept clean and hygienic which will assist with pest elimination.
MATERIALS AND EQUIPMENT TO STORE DEHYDRATED FOOD
Apart from thoroughly dehydrating your food, It’s also important that you store your dehydrated foods correctly in order to get maximum shelf life from them. You can store your dehydrated food in:
- Sealable vacuum bags using the double-bagging process (for long-term storage);
- Glass jars (typically for shorter-term storage);
- Food grade storage buckets (medium to long-term storage)
Let’s have a look at these 3 main storage materials/equipment:
- Vacuum and Mylar Bags
Typically, correct storage involves vacuum sealing the food in a vacuum bag together with oxygen absorber sachets and then placing your vacuum bag inside a heat-sealed Mylar bag (commonly referred to as “double-bagging”).
The vacuum bag with vacuum seal helps to remove any remaining oxygen which is important as oxygen degrades food over time. The double-bagging system using the Mylar bag is to reduce heat and keep out sunlight due to its reflective material. Both heat and light are two other food degrading elements and must be eliminated or substantially reduced when storing dehydrated food in order to increase the food’s shelf life.
2. Glass Jars
Glass Jars like mason jars are typically made use of for shorter-term storage owing to the fact that they don’t block out as much light as the double-bagging process above and as already mentioned, light slowly degrades food over time.
3. Food Grade Storage Buckets
Using food grade storage buckets is another great option for storing larger amounts of dehydrated food.
When using these buckets, make sure that you only opt for food-grade plastics as ordinary plastic buckets will leak chemicals into the food from the plastics used.
Make sure that the lid on the bucket can be sealed or closed tightly and add oxygen absorbers to your bucket if you’ve stored the food in sealed bags within the bucket. It’s also a good idea to swap out your current bucket for a new one at any sign of deterioration i.e. the lid is not tight anymore or the bucket has already been used for a couple of years.
You can easily purchase all of these storage items online or at local canneries:

CHOOSING THE RIGHT DEHYDRATOR
Choosing a good dehydrator may seem a bit daunting at first when you are new to this type of food preservation but the main thing to look out for is the placement of the fan.
You’ll want to purchase a dehydrator that has a fan located at the back instead of one that has a fan placed on the bottom or on the top.
Fans located on the top or bottom will blow the flavor of foods on the closest tray to other foods which is not ideal if you are dehydrating different foods at the same time.
Pro Tip: Never dehydrate garlic with other foods as it may very well add undesirable flavors to the other food.
Fans placed at the bottom or top will also not provide an even flow of air which will affect your drying time and results, particularly when you have two or more trays of food in the dehydrator at one time.
There are plenty of dehydrators available for purchase online depending on your preferences such as size limitations for your kitchen, what foods you intend dehydrating (a variety versus a select few), your budget and whether you are just doing it for home use or for business purposes.
As long as you stick with the recommendation of the fan placement, and are wise about reviewing products first, you can’t go wrong!
ESSENTIAL EQUIPMENT AND SUPPLIES FOR DEHYDRATING FOOD
I’ve already mentioned various supplies and equipment necessary for starting to dehydrate foods throughout this article, but here’s a concise recap of the most important items you’ll need at the outset for dehydrating success:
- Latex gloves – to use when handling food
- Eco-friendly surface cleaner – to ensure that proper hygiene is adhered to
- Spray bottle for lemon juice – this will prevent waste and is advised over soaking food in lemon juice
- Vacuum bags
- Vacuum sealer machine – this gets the most air out of your dehydrated food to retain integrity of food long-term
- Mylar Bags – used as part of the “double-bagging” process and prevents light from degrading food
- Oxygen absorbers – to reduce moisture in food for longevity
- Glass Jars
- Food grade storage buckets
- Dehydrator

FREQUENTLY ASKED QUESTIONS
Is It Possible To Overdry Food Using The Dehydrating Process?
Absolutely not! In fact, rather than being concerned about overdrying food, it’s better to be cautious of underdrying food since moisture left in any food can result in it going bad and spoiling.
Typically, when dehydrating food, about 95% or more of the moisture is removed which allows the food to be preserved for years while still retaining it’s delicious taste and flavors for later use.
What’s The Ideal Temperature For Dehydrating Fruits And Vegetables?
The best temperature for dehydrating either fruits or vegetables is around 120-125F. If you dehydrate these foods at higher temperatures, you run the risk of hardening the food on the outside while the inside remains moist which will cause the food to spoil.
This is commonly known as “case hardening” but can be avoided by dehydrating your food at lower temperatures for a longer period of time.
How Do I Know That My Food Has Dehydrated Enough?
All food that can be dehydrated needs to reach 95% or more total dehydration which will ensure that there is no moisture left in the food that could make it spoil. Reaching 95% or more dehydration will also ensure that your food lasts for a very long time.
While there’s no precise way to measure the percentage of dehydration reached, you can conduct three simple tests that will help you to determine whether your food has reached 95% dehydration or more.
Here are 3 easy ways you can test for adequate dehydration in food:
- 5 – 10 minutes after your food has dehydrated, test for any residual moisture by touching your food. If it’s still slightly sticky or moist then it hasn’t reached 95% dehydration and needs to go back.
- Another good indication of whether your food has reached proper dehydration is by touching for dryness. The food should feel dry and can either be torn like paper or it should make an audible sound if dropped or tapped against a surface.
- Once your dehydrated food has been allowed to cool, place it in a sealed zip lock bag and return a little later to check for any moisture that would have resulted in condensation. If this has occurred then your food is not adequately dehydrated and requires additional time.
Are there any particular foods that can’t be dehydrated At Home?
While there are so many foods that can be dehydrated, there are some that won’t ever dehydrate adequately and these include the following:
- Anything that is high in oil content will not dehydrate properly. Examples of this includes avocados, nuts (or any variation of them i.e. nut spread). Note that you can dehydrate medium-oil foods such as certain meats as well as olives but even these foods will never dehydrate quite as well as fruits and vegetables and will therefore need to be consumed sooner due to their shorter shelf life.
- Lettuce is another food that doesn’t dehydrate well due to it’s high water content. If you attempt dehydrating lettuce then you’ll notice how it looks wilted and burnt. A great substitute for lettuce that you can dehydrate well are collards.
- Certain animal products such as egg, milk, and cheese are high in oil and are therefore hard to dehydrate using conventional home dehydration methods. Instead, dehydrating these types of foods calls for the use of specialized commercial equipment.
How Long Does It Take To Dehydrate Food?
The answer to this really depends on what you are trying to dehydrate as well as other factors such as:
- The humidity level where you live and inside your house;
- How thick or thin your slices of food are;
- How crowded or spread out your food is on trays; and
- The type of dehydrator you use and the position of its fan – those with fans at the back tend to do better than those with fans at the bottom or top, especially if you have two trays occupying space as the second lower tray will always block flow to the first tray.
Rather err on the side of longer times on lower heats than trying to rush the process by increasing the heat as this can often result in case hardening.
Here are some typical dehydrator times you can apply to certain foods, understanding that they may vary based on the factors listed above:
- 8 – 10 hours: For frozen vegetables, sliced mushrooms, chopped onions, thinly sliced fruit
- 8-15 hours: For fresh vegetables
- 12 – 15 hours: For sweet and normal potatoes, thicker slices of fruit or the juicier variety of fruit such as peaches, plums, apples, nectarines, and pears
- 15 – 20 hours: For grapes and fruit roll ups
- 18 – 20 hours: For blueberries
How Do I Rehydrate Dehydrated Food?
There are two main methods for rehydrating dehydrated foods depending on the length of time required to rehydrate:
The first method entails soaking dehydrated fruits and vegetables in either boiling or cool water for 10 minutes or more (but less than 4 hours) and then draining the excess water. Simply use a ratio of 1 cup of water per 1 cup of dehydrated vegetables or fruit.
The second method is applicable in instances where the food needs to soak for 4 hours or longer. In this case, you place your food in glass sealable jars which are filled with either water, juice or brine and store in your refrigerator until fully rehydrated for approximately 24 hours.
With the second method, you will need your choice of liquid used to either be lukewarm (applicable to fruits) or boiling (applicable to vegetables).
Use your hydrated fruits to make fruit salads or delicious pie fillings while you can simply heat up your vegetables once fully hydrated to serve as a side dish!
THE BOTTOM LINE
There are so many benefits to dehydrating food that you’ll be wondering why you didn’t start sooner!
While this article has been written to offer tips and guidance to those just starting out their dehydrating journey, it’s also detailed enough to cover some of the most important aspects for correct dehydration of foods to ensure that you get the best results possible and can enjoy the fruits of your dehydrating efforts for years to come!
The more you get into dehydrating food, the easier it’ll become in understanding why and how the dehydration process is different for certain foods due to their own unique compositions and the effects that this has on the entire dehydration process including storage requirements.
If you are just starting out and have discovered other helpful tips, be sure to share them…I’d love to hear from you!

